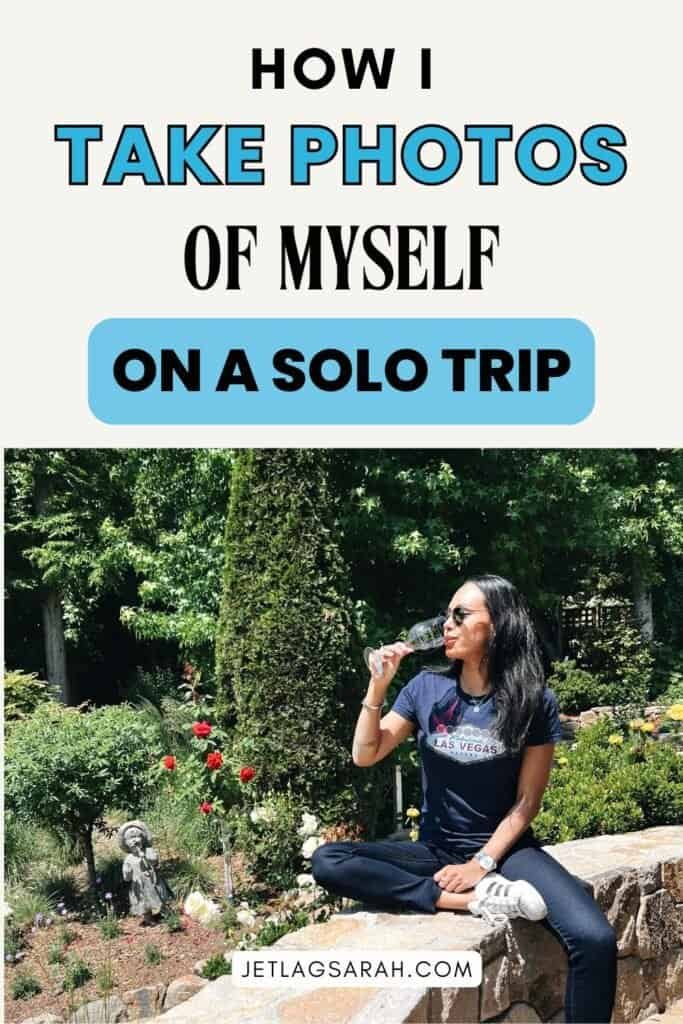
How I Take Photos Of Myself On A Solo Trip: Without Feeling Awkward
This post may contain affiliate links. That means if you click and make a purchase, I may earn a small commission at no extra cost to you. I appreciate your support!💙
There was a time I’d pack my bags, fly off to a dreamy destination, and come back with hundreds of photos but none of me in them. How I take photos of myself on a solo trip without feeling awkward has been a process since forever. It’s not easy, I know.
I was too embarrassed to set up my tripod in public. I felt like an idiot standing there alone, trying to pose while strangers walked past. But looking back, I regret it.
In 2021, I was in Santorini, and the island was still relatively quiet (post-COVID). And I don’t have a single photo of myself wandering those empty, iconic white cobbled streets. Not one.
That trip changed everything.
I realised I didn’t want to keep hiding from my own memories. So I found a system. I figured out how to take photos of myself without shame and without it taking forever.
Do I still get awkward? Absolutely. But I’ve learned to push through it, and in this post, I’ll show you how you can too.
From the exact gear I use, to how I set up shots quickly and confidently, to the mindset that helped me stop caring what other people think. This is my real guide to taking your own photos while travelling solo.
My journey with solo travel photography
Solo travel photography didn’t come naturally to me. I’ve actually been travelling alone since around 2014—between personal trips and layovers as a flight attendant—but I rarely took photos of myself.
I bought my first tripod more than 10 years ago. Just because I had one didn’t mean I was using it. It stayed in my bag most of the time, because I felt too uncomfortable to pull it out in front of people. Not every place feels safe or suitable for tripod photography, especially when you’re walking away from your camera.
Today, I’ve developed a system that works. Between lightweight gear, camera apps, and some trial and error, I now know how to get good photos quickly—without needing someone else to take them.
The gear that helps me feel more confident taking photos by myself
The right gear doesn’t just help you take better photos—it makes the whole experience less awkward, faster, and way more doable when you’re travelling solo. These are the tools that make me feel most confident when I’m shooting alone.
Depending on the trip, I’ll bring one, two, or all three of my tripods. Each one has a specific use, and I switch depending on where I’m going and how much I want to carry.
Mini tripod/selfie stick combo
This one’s my go-to for quick, casual shots, tripod. It’s compact (about 20 cm when folded), easily fits into my bag, and doubles as a selfie stick. It’s perfect when I don’t want to attract attention or spend time setting things up.
The downside? It’s not very sturdy—especially when fully extended. It works best on a table or raised surface, but it’s still the one I use most often when I want something fast and discreet.
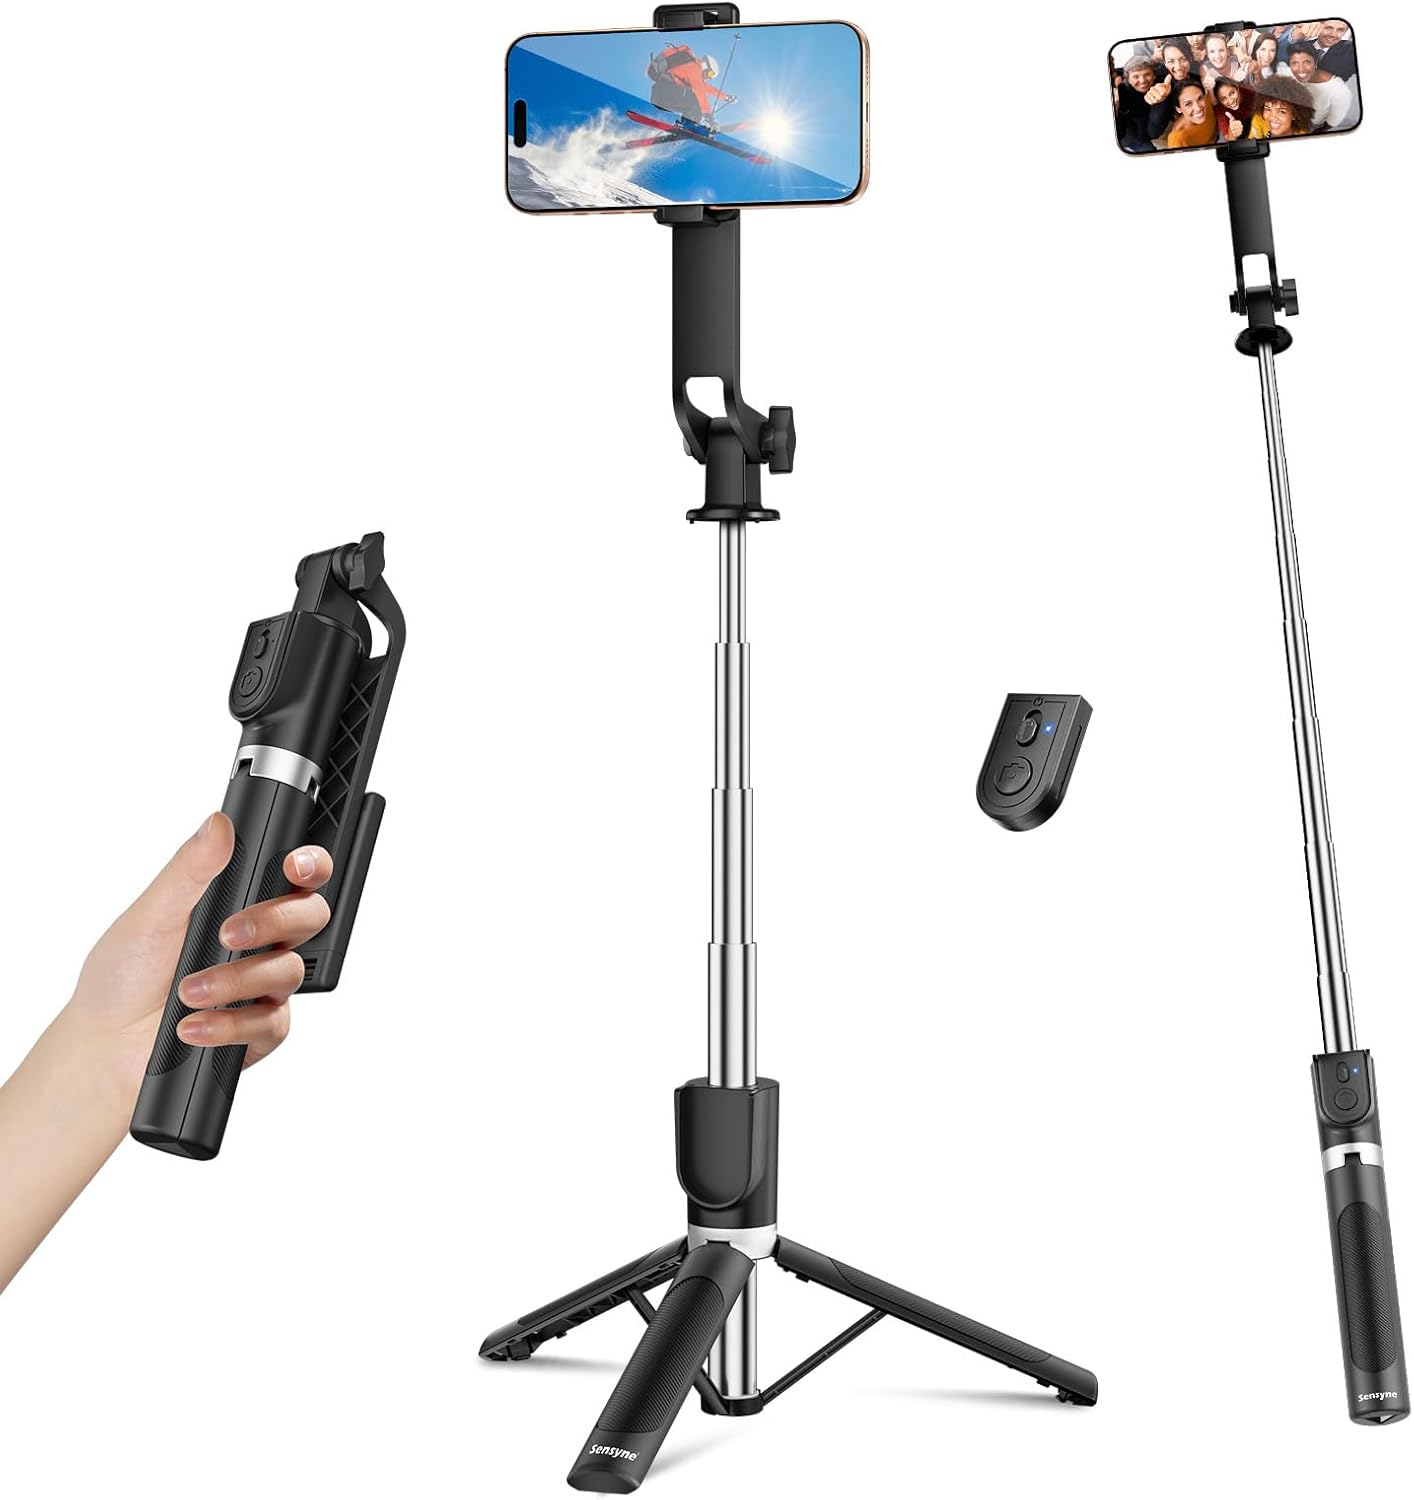
Mid-sized collapsible tripod
This is the Toneoff tripod you probably see all over social media. It’s lightweight, collapses to around 25 cm, is super easy to set up and is long enough. I can just whip it out, extend it in seconds, and start shooting.
It’s a lot sturdier than the mini tripod, so I trust it more on flat ground or in busier areas where I want to feel confident that it won’t tip over.

Professional tripod for uneven surfaces
If I’m heading on a longer trip or shooting in places with uneven ground, this is the Zomei tripod I bring. It’s a bit heavier and bulkier (around 40–45 cm when folded), but the trade-off is stability and flexibility.
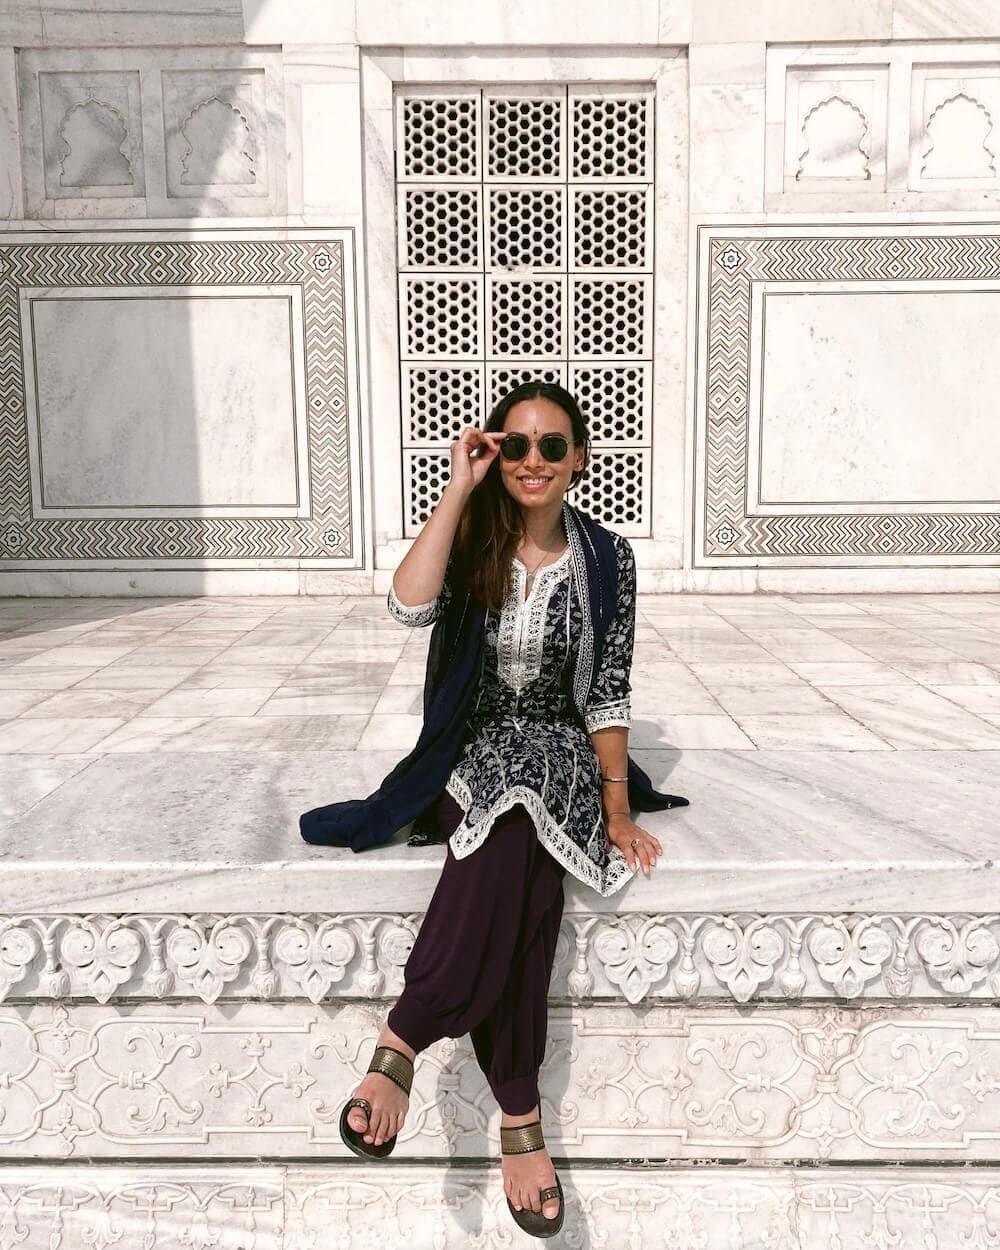
It’s perfect for windy conditions or hilly landscapes because the legs can be individually adjusted to sit flat on uneven ground. I used this tripod a lot in Japan, where not every street or location had a smooth surface to work with.
It does take more time to set up, but when I want to make sure my phone or camera stays secure, this is the one I trust the most.

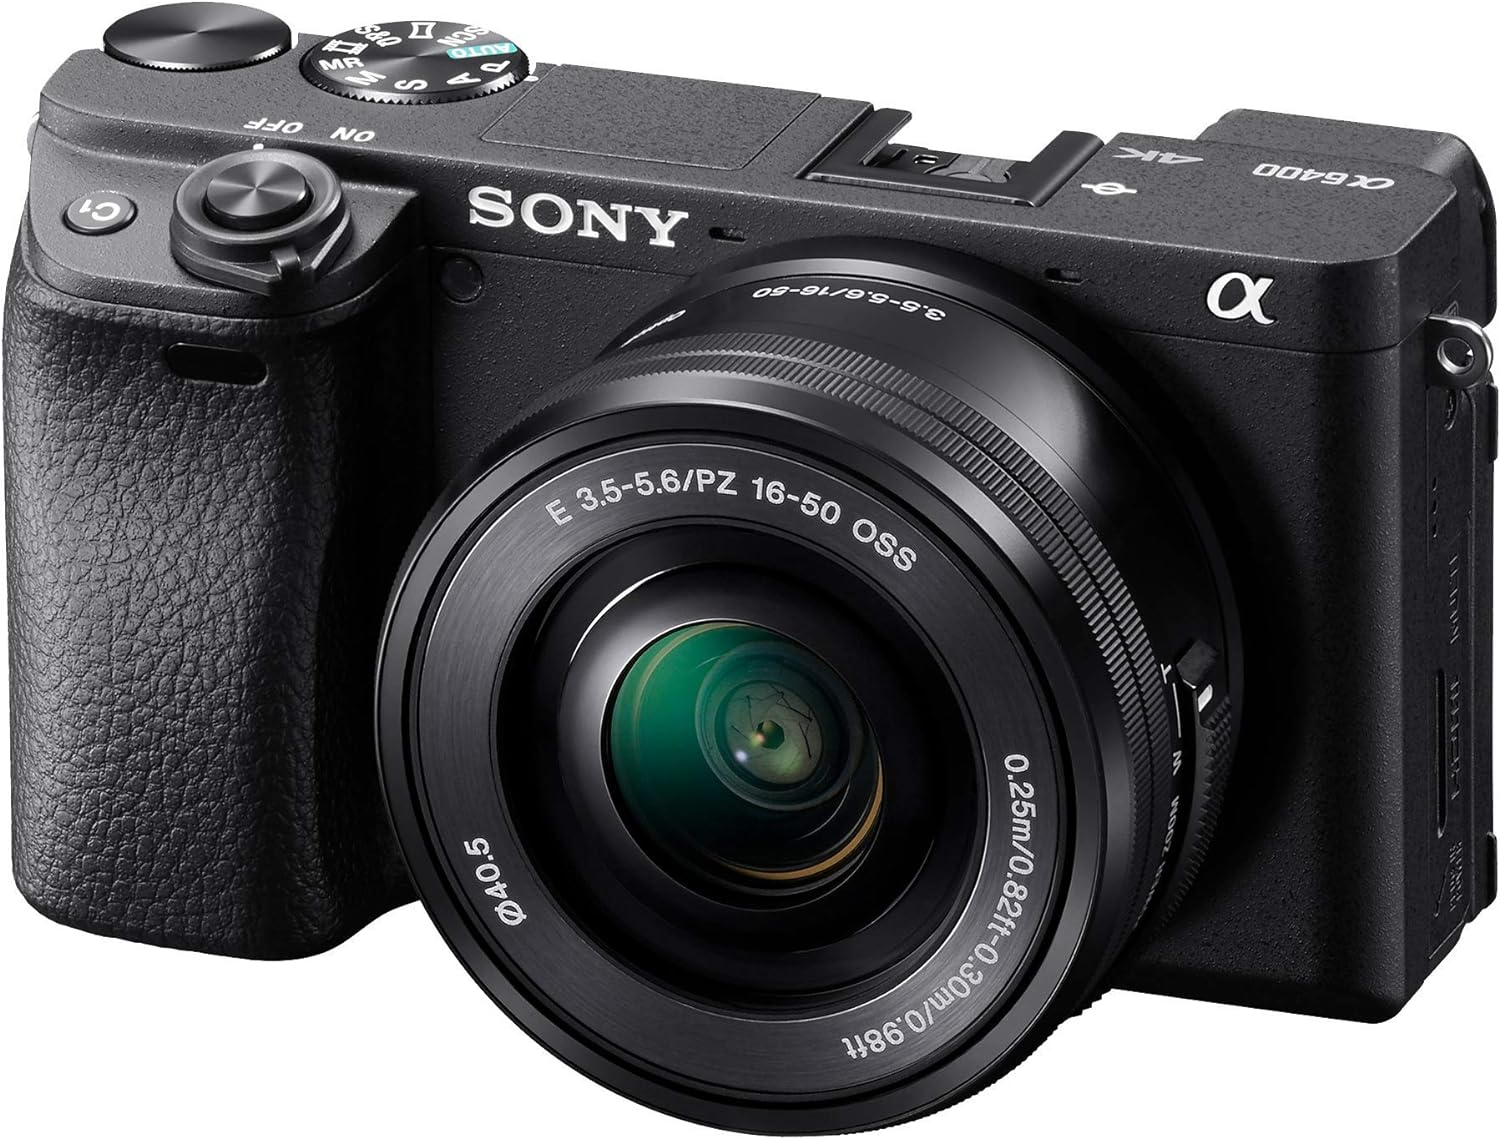
Camera vs iPhone
I have an amazing Sony mirrorless camera (the Canon Gx7 is also a solid and popular camera), and I also shoot with my iPhone 13 Pro. Honestly, I love both—but these days, I mostly just travel with my iPhone.
Unless I’m specifically planning a shoot where I need high-quality RAW images, my iPhone does the job beautifully. It’s lightweight, always with me, and way easier to use on the go. For most solo travellers, it’s more than enough.
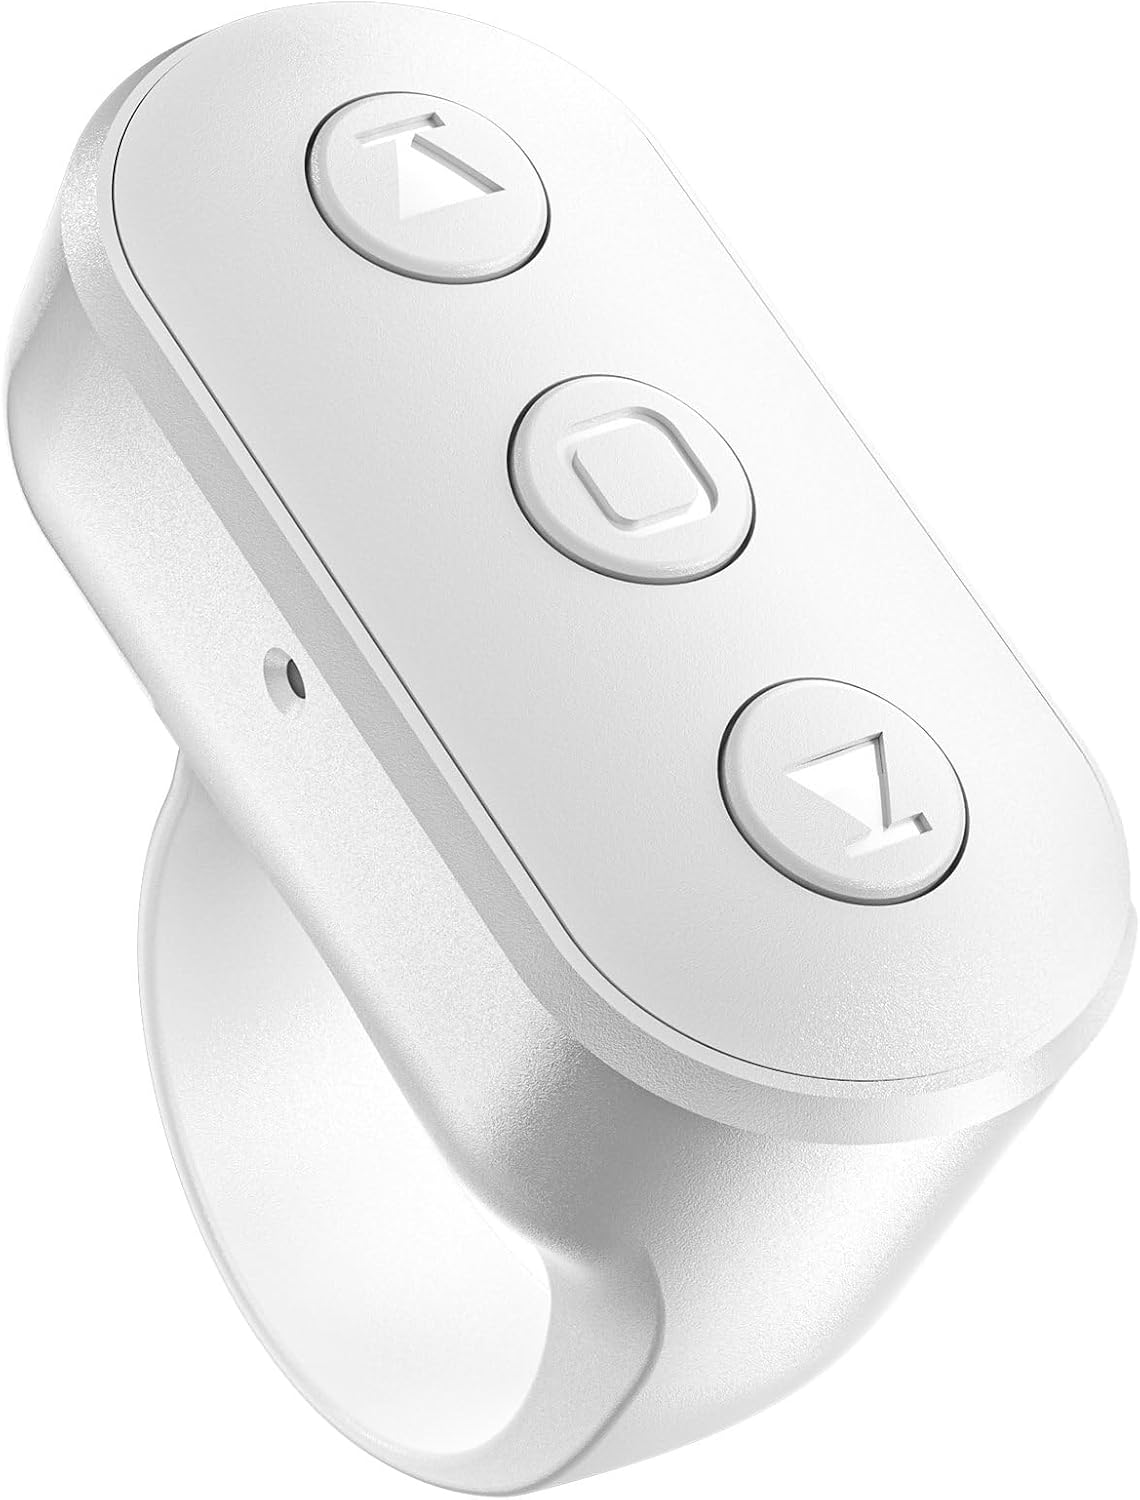
Remote shutter vs app
I used to use a Bluetooth remote shutter, and I still pack one just in case. They’re especially handy when you need to take a shot from far away, or when you don’t want to rely on timers.
But lately, I rarely use it—because I’ve switched to using an app that does it all.
LensBuddy app
This app changed everything for me. LensBuddy lets you automate your photos so you don’t need a remote or timer. You just set it to take a burst of photos—10, 20, 50, whatever you like—and adjust the pause between each one.
It even lets you shoot video and take photos at the same time.
It’s discreet, reliable, and lets me focus on posing or moving naturally while the app does the work. If you’re nervous about using a clicker in public or just want something easier, LensBuddy is the app I recommend to every solo traveller.
A Clip-on LED light
One piece of gear I always bring is a small, clip-on light. It’s basically a mini clip-on LED light, and it clips right onto my iPhone, laptop, or camera.
It’s small, lightweight, and surprisingly powerful. I use it in hotel rooms if I want to shoot content with decent lighting, or when I’m filming or photographing in dim spaces. I’ve also used it outdoors—like in Japan, when I wanted to shoot early in the morning and the light was still grey and overcast.
This little light makes a huge difference in low-light settings. It instantly brightens up your face and helps avoid that grainy or dull look that can happen indoors or at night.

use your Apple Watch
If you use an iPhone and have an Apple Watch, you can also use the camera remote. On your watch, you can see the frame, set a timer (if desired) and click. It’s so handy if I want to see if I’m in frame.
Do I plan my shots before I leave the hotel?
I’ll be honest—I’m not a professional photographer. I look at other people’s travel photos sometimes and think, wow, that looks amazing. But the truth is, I just do my best. I love photography, and I’ve slowly been figuring out what works for me.
I don’t really plan my shots ahead of time. I’m more of a go-with-the-flow type of person. Most of the time, I just walk around, look at the light, and decide on the spot if it’s a good place to set up. If I’ve already been somewhere before and I know there’s a beautiful view or backdrop I want to shoot, I’ll keep that in mind.
For me, solo photography needs to be quick, simple, and stress-free. I don’t want to go out of my way or spend an hour trying to create a shot. That said, I do scroll Instagram and Pinterest for inspiration. I follow travel accounts I love, and I use them as creative fuel. I believe in finding your own vibe.
Golden hour and sunrise are always my favourite times to shoot. I’ve woken up at the crack of dawn—like in Japan—to catch the light just right. But I’ll be honest: taking golden hour photos by yourself isn’t always easy. It can be hard to adjust settings or angles in that soft light.
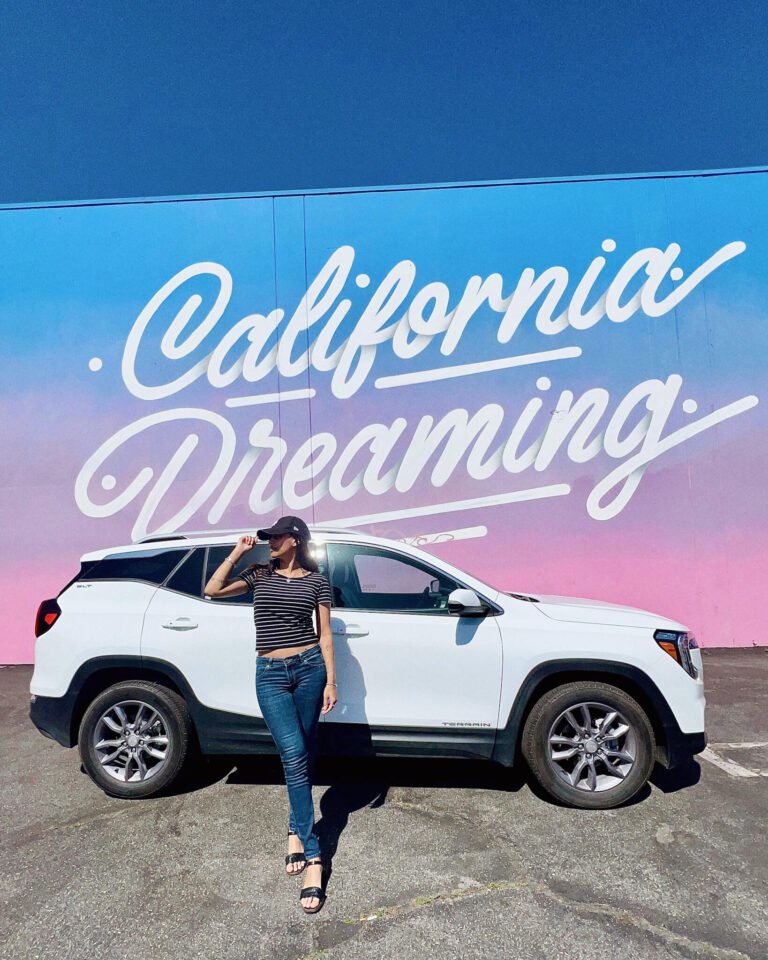
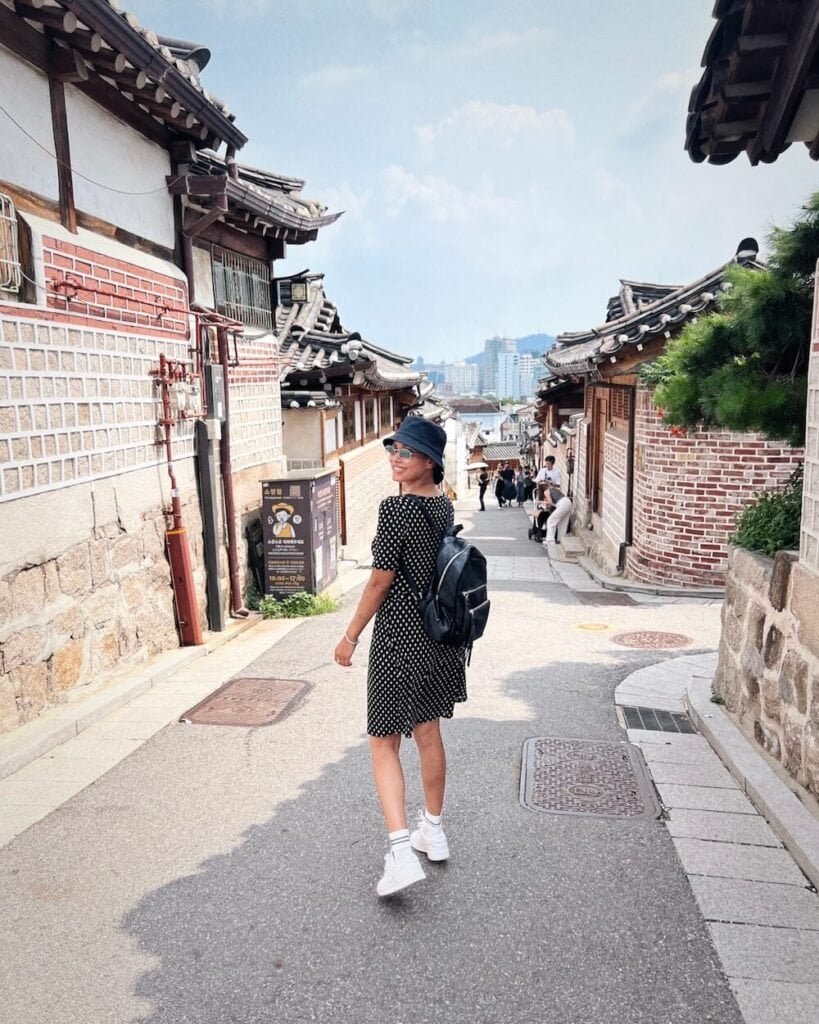
As for outfits? I keep it simple. I wear what I want to wear. I’m a neutral kind of girl—black, navy, maybe a red accent here or there. That helps when it comes to photos, because it tends to work with any background. But I’m not the type to carry multiple outfits or wear floaty dresses for the sake of a photo.
My step-by-step process for shooting photos of myself
When I’m taking photos by myself, I don’t want to spend an hour setting up or overthinking every shot. But I do follow a simple process that helps me move fast, feel confident, and get good results—without needing anyone else behind the camera.
Here’s exactly what I do:
1. Find the right background
The first thing I look for is what I want in the background. Whether it’s a city view, a beach, a temple, or a mountain, it needs to add something to the story of the photo, not distract from it. Once I’ve found a good backdrop, I look at the lighting.
2. Check the light
Lighting matters—always. Yes, you can adjust a lot in editing, but nothing beats good natural light. If I’m shooting during the day and the lighting is excellent, I sometimes use the front camera for speed and ease. But in general, the back camera gives better quality, so I use that when I want the best results.
3. Frame the shot and mark your spot
Once I’ve chosen the background and lighting, I frame the shot using my phone or camera on the tripod. I usually place the tripod at eye level.
Then I use a simple trick to help me know where I need to stand: I place a water bottle, bag, or any small item in the frame where I want myself to be. That way, when I review the test shot, I can check the position, spacing, and angle before I start taking real photos.
4. Use burst mode and keep moving
I use the LensBuddy app to take burst photos. I usually set it to take 20 or more shots with a few seconds between each one. While the app is shooting, I just keep moving—stepping forward, turning slightly, changing my expression or pose. The goal is to capture some natural-looking moments without standing completely still.
5. Review the shots, adjust if needed
After a round of burst photos, I quickly scroll through the shots to see if I need to redo anything. If it’s a crowded or busy place, I’ll just work with what I’ve got. Sometimes you only get a few minutes before the space fills up or the light changes, so it’s okay if it’s not perfect.
6. Record a video and screenshot it
If I want content for social media and I don’t need super high-quality images, sometimes I just shoot a video in 4K and move around naturally in the frame.
Later, I go through and screenshot my favourite moments. This is something a lot of content creators do, and it’s a great option when you’re short on time or want lots of variety without constantly adjusting the camera.

Tips and tricks to get better solo travel photos
You don’t need to be a professional or own a fancy camera to take great photos of yourself while travelling solo. But there are a few things I’ve learned along the way about photography.
Here are the tips and tricks that have helped me:
1. Turn on your grid and use the rule of thirds
This is a small setting with a big impact. Turning on the grid lines in your camera app helps you line up your shot and position yourself in a more natural, eye-pleasing way. The rule of thirds is basically about placing your subject on any of the specific points on the grid.
It’s definitely harder to do when you’re not behind the camera, but it helps if you use a marker (like your bag or water bottle) to guide where you need to stand.
2. Make sure the light is behind the camera—not behind you
Lighting can make or break your shot. If you’re shooting directly into the sun, you’ll end up looking like a silhouette while everything else is blown out. Instead, try to position yourself so that the light is hitting your face or side-on, not shining straight into the camera.
If the light is too harsh, find a shadowed spot within a sunny area—that’s often where the most flattering light is.
3. Watch your framing: head space, feet, and background
This one’s personal, but seriously: please don’t cut off your feet. Unless you’re intentionally going for a half-body or portrait shot, chopping off only the feet just looks ridiculous
At the same time, don’t leave too much space above your head or too much white space below your feet. Keep the shot tight, intentional, and clean. If you’re unsure, just take a moment before hitting burst to check your background. Ask yourself: Is this actually framed well?
4. Don’t stress about perfection—edit later
You can always fix small things after the fact. I use Lightroom or sometimes just the basic iPhone photo editor to adjust lighting, crop slightly, or fix the framing. Post-production can make a bad photo better.
5. Try close-up or detail shots, too
It’s easy to think travel photos have to be full-body, scenic moments—but don’t underestimate the power of close-ups. Take a portrait with a blurred background.
Zoom in on your jewellery, your coffee cup, or the fabric of your dress against a cool wall. These smaller moments can add so much texture and personality to your travel photos.
Learning how to pose in front of a camera is a must
I’m not a photogenic person; I’m awful at taking good photos of myself. Learning how to pose or how to manage your facial expression is an underrated skill. So what I did was practise in the mirror. Believe me, it works.
If you know what your best angles are, you will feel more confident, more in control and less awkward. It will also speed up the process.
Most of my bad photos were because of me looking like I swallowed a bug (let’s be honest, we look at our face and body first when judging a photo). So, I practised on my runway face and channelled my inner model.
You can also find a ton of photo ideas on Pinterest and social media on how to pose. How can you pose to make a photo look better? If you practise on a few poses, even ones where you’re looking away, it helps a lot.
Because the faster you know what to do in front of the camera, the faster you’re done.
Tricks for me are:
- Looking away from the camera
- Walking away from the camera, like a back shot
- Walking and looking to the side
- Wear sunglasses
- Keep moving, whether that’s walking in place, laughing, twirling, or even pretending to fix your hair.
- Have a prop like a latte or a bag
How to not feel awkward taking photos solo
Feeling awkward taking photos by yourself is totally normal—but it doesn’t have to stop you. You’re out there, on a solo trip, doing something bold and badass. You deserve to be in your own story. And if you want photos that actually show that? You’re going to have to get over that fear of being judged.
Because honestly… who cares what other people think?
Most of the time, strangers have zero idea what you’re doing. Or they do—and they don’t care. If you look around, tons of people are doing it. I’ve seen solo travellers, couples, influencers at the grocery store filming themselves—no one’s hiding anymore. So why should you?
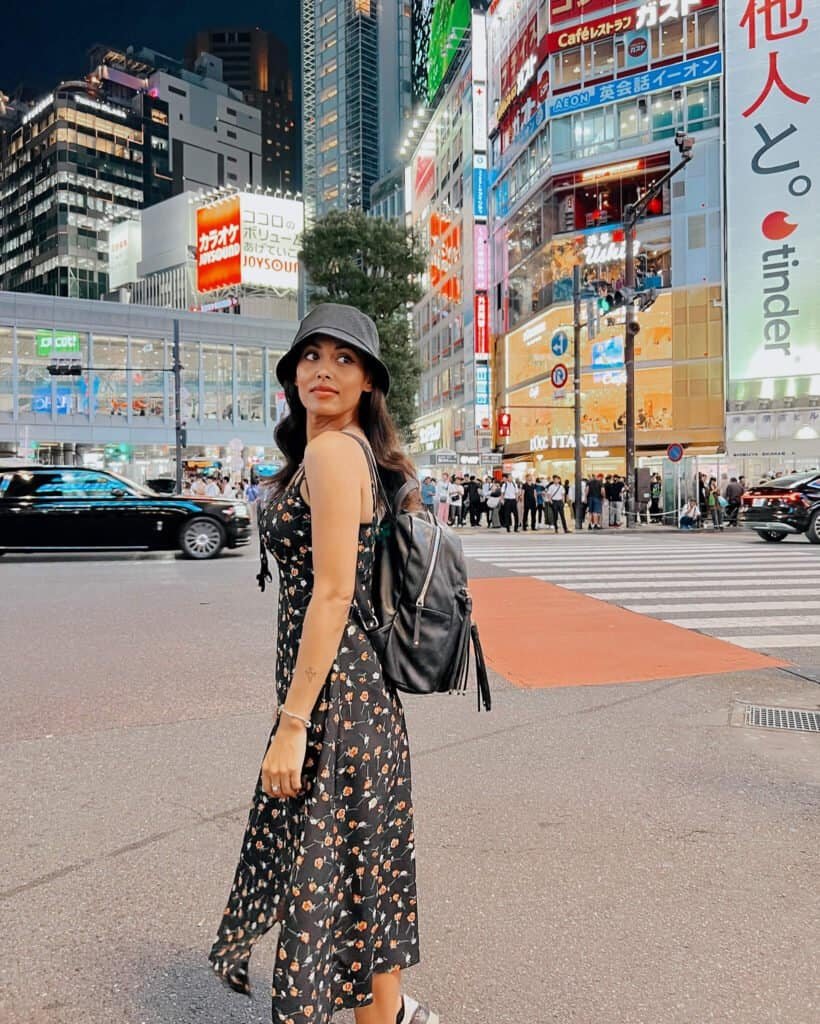
You just have to get through that first minute of awkwardness. Once you’re in your flow, it fades. I remember shooting at the busy Shibuya Crossing in Tokyo, and I was so in the zone I didn’t care who was watching.
People were walking past, looking at my tripod and LensBuddy app, and even asking questions like, “What app is that?” It actually turned into a fun moment.
If you’re still feeling shy, start small:
- Go early in the morning when places are quiet
- Choose less crowded spots to build your confidence
- Use your phone like you’re on FaceTime—it makes the tripod less intimidating
- Put your sunglasses on and pretend you’re a fashion blogger 😎
Whatever works for you—just start. The more you do it, the easier it gets. Don’t travel halfway around the world and come home without one photo of yourself in that dream destination. You’ll regret it—and that’s a way worse feeling than being stared at.

The apps I use to make my solo travel photos better
LensBuddy
LensBuddy is my go-to for taking solo photos. It’s an app that works like a burst timer—you set it to take a photo every second (or however long you want), and it just starts shooting while you move or pose.
It replaces the need for a clicker, which I barely use anymore. It’s super simple, quick to use, and honestly a game-changer if you’re taking photos by yourself.
Tezza App
My absolute favourite filter app—hands down. I’ve been using Tezza for years, and I love how much it’s evolved. I use it for filters, light editing, adding grain, and sometimes cropping.
They’ve got everything from vintage film vibes to modern, clean edits, and it’s the only filter app I’ve stuck with consistently. Every photo I post is filtered through Tezza. I’ve got a few favourite filters that I rotate depending on the trip or vibe.
Lightroom
Lightroom is the more advanced editing app I use—especially when a photo needs more help. It’s part of Adobe (like Photoshop), but this version is way more beginner-friendly if you understand the basics of photo editing.
There’s both a desktop and mobile version, and it gives you full control over lighting, shadows, colour, and sharpness. This is the app to use if you want to give your solo photos a more professional finish.
Retouch App
This is the app I use when I need to remove unwanted things in the background—like a trash can, a person walking by, a sign, or random objects that ruin the shot.
Yes, it’s a paid app, but it’s 100% worth it. I’ve tried other tools that mess up the photo or make it look weird—this one actually works. It’s saved more photos than I can count and makes everything look clean and distraction-free.
Plan your trip
With my online resources
Use my travel planning roadmap with all my digital resources to book every detail of your trip!
Ready to capture amazing photos on your solo Trip?
You don’t need to be a professional photographer to take beautiful photos of yourself while travelling solo. You just need the right tools, a little bit of confidence, and a willingness to try—even when it feels awkward at first.
I still feel self-conscious sometimes. But I also know how much it sucks to come home from an incredible trip with no photos of me in those once-in-a-lifetime places. So now, I show up—even if I feel silly doing it.
You deserve to be in your memories. You deserve to take up space. And you deserve to have photos that show how far you’ve come—literally and figuratively.
Start small. Take a few shots on your next trip. Try LensBuddy. Get comfortable with your tripod. Find your favourite angles. It doesn’t have to be perfect. It just has to be you.
Ready for more solo female travel tips?
- Travelling Solo For The First Time: A Guide For Women
- Why You Should Stop Waiting For Others To Travel With (And How to Start Today)
- How To Survive A Long-Haul Flight: Flight Attendant Secrets You’ll Actually Use
- The Ultimate Long-Haul Flight Essentials 2025: How to Get Comfortable
I love to hear from you and your solo travel adventures! And if this post was helpful, share it with your friends, leave me a comment below or on Instagram.